Archive

Archive for the ‘Personal’ Category

The UC Architects Podcast – Oh My God, They Let Me Host!

July 3rd, 2012 No comments

4 or 5 weeks ago, fellow MVP Steve Goodman sent out a tweet about possibly starting a podcast, and asking if anyone was interested in participating.

And so it begins

Steve Goodman’s original tweet about starting a podcast

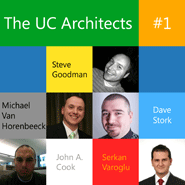
There was quite a response, and 13 people in total started “The UC Architects Podcast” project. Within about 2 weeks, a website was born, Twitter, Facebook, and LinkedIn accounts were up and running, and the first episode was recorded. Steve hosted that episode, and four of the group were co-hosts. Post production editing was performed, and the episode was launched via web, iTunes, Zune, and RSS. What an accomplishment!

That first episode was quite a learning experience for all involved. Not only did topics need to be chosen and discussed, but the technical details of producing a podcast had to be researched. That first episode was recorded as a Lync conference, and the resulting audio pointed to possible improvements in recording hardware, techniques, etc. Every step of the way was based on group decisions and suggestions. When it came time to start discussing episode two, I was honored to be chosen as the host. Steve set a high bar with the first episode, and I was excited yet nervous at the opportunity.

I created a simple text file that was essentially a brain dump of ideas I had about what to discuss from a technical perspective about Lync and Exchange, as well as including some things we missed in episode 1, like mentioning our website, Facebook page, and other details. Topics are chosen by consensus of the group, but I had some ideas for “mini feature”. I listened to episode 1 several times, as well as my normal podcast subscriptions like TWiT, The Tech Guy, and others. Once I had a long list, I organized it into a flow of the complete episode. My plan was to work from the top down. This would help me stay focused, as well as making sure I didn’t forget something.

Scheduling a conference call involving a half dozen people scattered around the world was probably the most challenging issue. We used http://www.doodle.com to figure out the best schedule for everyone. Unfortunately, this resulted in a couple of the originally scheduled architects to not be available, so a couple of others stepped in. This also caused a couple of changes to the proposed topics as well.

When the time came to hold the Lync conference call, we had a brief meeting before starting the episode, and I shared out the notes in Lync so that everyone could see them. This turned out to be quite beneficial, as the co-hosts could see what was coming up. An occasional IM by the others, including the episode’s producer Dave Stork, really helped the show flow. I could, however, tell that my normal public speaking issue was coming into play – I was rushing things.

I managed to step back a little and let the co-hosts run with some topics and stretch things out a little. This really helped me relax a little, and ensure I wasn’t dominating the conversation as much.

We wrapped up all of the items on the list, and I closed the episode. Once that was done, we had a quick discussion on something that we missed, so we just picked it back up, discussed the topic, and it was later edited into the right place of the recording.

A post-recording briefing was beneficial for discussing the episode, and then the recording was off to the editor, Michael van Horenbeeck. An episode specific graphic was created, the episode’s summary page was created, the files were updated, and lastly, the podcast XML file was updated. At that point, the episode was live, and available online. Well, after I fixed a typo in the XML file. Whoops. At that point, many of the guys in the group begin socialized the episode via blog posts, Twitter, and Facebook.

What an experience! As much as I, like many people, don’t like to hear the sound of their own voice, I listened to the final edit and made notes on a couple of areas, including meeting flow, speaking styles, and audio quality. The audio quality is somewhat limited mainly due to Lync’s recording mechanism and embedded codecs, however we continue to tweak. Little quirks like the background sound of people playing with their mic, typing on their keyboard, or Windows sounds like Lync IM notifications were noted as areas for improvement. And my own speaking style didn’t escape my critique. Lots of “um” and “ah” type comments were fortunately edited out, but a few still remained. And I think I sounded a little stiff. But I managed to survive and had a ton of fun.

Steve is returning as host for episode 3, with me likely returning for episode 4. Even as episode 2 was being posted, I realized there has been ~700 emails between the group! Plus IMs, Lync calls, etc. Planning is well underway for episodes 3 and 4, and I’m excited to see what’s next. We’re planning on having people from the Lync and Exchange product groups, as well as vendors and other UC architects as guests in upcoming episodes.

Be sure to check out the podcast and let me know your thoughts, suggestions, and critiques.


Categories: Personal Tags:

Trusted Traveler Program – My Journey to Faster, Easier Security Screenings at the Airport

March 5th, 2012 No comments

I travel a LOT. 200 days away last year – nearly all of them weekdays. I am continuously streamlining my travel process, from how/what I carry to how I dress, to when/where to arrive and park. Doing so has made the travel process much easier. And easier means more time at home or client sites, and less time frustrated at airports.

Last October, the TSA and some airlines rolled out a program called Known Traveler Screening. This program uses the Customs and Border Patrol’s (CBP) Trusted Traveler programs and allows those in the program to go through much quicker security screening by prescreening them. Four airports were in the original pilot, including my home airport, Detroit Metro (DTW). The program is now being expanded to dozens more airports throughout the country.

CBP has several programs that help streamline travel for those going between the U.S. and other countries. Global Entry deals with entry into the U.S. by U.S. citizens from abroad. Nexus focuses on travel between the U.S. and Canada. And SENTRI focuses on travel between the U.S. and Mexico. In order to be a Trusted Traveler, you need to be enrolled in at least one of the programs.

Here is the process I went through:

January 15th, 2012 (Day 0): I enrolled in CBP’s Global Entry and Nexus programs using the Global Online Enrollment System (GOES). My company has an office in London, plus there are always some conferences in other countries, and, who knows, maybe a client or two. So Global Entry made sense. I live near Detroit, which is just across the river from Windsor Canada – home of some nice dinner establishments and a big casino and entertainment venue. So that program made sense.

Enrollment requires a fairly detailed form submission, including passport and drivers license info, residence and contact info, and employment info going back ~7 years. It also requires a $50 application fee. Once submitted, you’re advised to check the status of the application regularly. In my case, I checked every couple of days, and each time, the status read “Pending Review”.

February 24th (day 40): I received an email stating there had been a change in status for my application. Upon logging into the GOES site, my application had a link for “conditional approval notification”. Clicking the link showed a form letter stating my application had been processed, and I was “invited” to visit a Nexus Enrollment Center for an interview. To my surprise, I was able to electronically schedule my interview for the following day, a Saturday (really – the government – on SATURDAY?!). The local Nexus Enrollment Center was at the foot of the infamous Ambassador Bridge, the main crossing between Detroit and Windsor.

February 25 (day 41): I arrived about a 1/2 hour early for my interview. The Enrollment Center is in a string of office trailers near the bridge. It is staffed by agents from both CBP and the Canadian border service. When I entered, there were about 8 others who had just watched a video. As the video played for me, the others were processed through their interviews. The video was a quick tutorial on how to use the Nexus card for border crossings via auto and air.

Following that, I waited about 5 minutes before I was called. By then, nearly everyone else was already gone. I was asked a few questions about the nature of my travel, as well as some info on the restrictions of traveling into Canada for work purposes. A decal was affixed to my passport for Global Entry. A quick photo and electronic fingerprinting, and I was on my way with some pamphlets. Total time at the building was about 1/2 an hour.

By the time I got home, I had another change in status email. This one was for “Approval Notification” and contained a Nexus number. The same number showed on the main GOES page next to my Trusted Traveler Program link. It is referred to as “Membership Number / PASS ID”. This is where it gets a little confusing.

In doing some more research, it was frustrating to determine the next step, and I thought maybe I had enrolled in the wrong programs. Between CBP, TSA, and the airlines, no one used the same terminology, including program names, processes, requirements, etc. Through some trial and error, as well as reading some travel related forums, I determined that I needed enter a “Known Traveler Number” in the Secure Flight Passenger Data section of my Delta profile. Turns out, the Known Traveler Number is your Trusted Traveler Number, essentially the PASS ID mentioned above.

Further research indicated that it may only be valid for reservations made after the number is added to your profile.

February 26th (day 42): I left for a previously scheduled flight. Going through the Priority security line, I mentioned to the TSA agent performing the credential screening that I had submitted my PASS ID the previous day. She confirmed that the reservation must be made after the PASS ID is added for it to work. So, the normal Priority line for this flight.

March 1st (day 46): My Nexus card arrived in the mail. I was pleasantly surprised. It was less than a week since visiting the Enrollment Center. When it arrives, you must go back to the GOES web site and activate the card, similar to how you activate a new credit card. The card also came with a protective sleeve that prevents the RFID chip from being read while it’s in your wallet.

Friday, March 2nd (day 47): I booked a work related flight for two days later. During the booking process, I confirmed the Secure Flight Passenger Data screen did contain my PASS ID number.

Sunday, March 4th (day 49): When I went through the credential checkpoint, the device that scans my cell phone boarding pass now also displayed a “LLL” to the TSA agent (I believe that was it – but I only got a quick glimpse). I was directed down the Trusted Traveler line instead of the normal backscatter / magnetometer screening area. The Trusted Traveler area was MUCH faster and far more convenient. For one, there was only one other person in line, and I never had to wait for them as the process is too fast. I immediately noticed that there were no white bins – the bane of many a traveler. I was not required to remove my jacket, shoes, or belt, and did not need to empty paper or other items from my pockets – something the normal process requires. I was told to toss my wallet and cell phone into my bag. I walked through a magnetometer (metal detector), and waited MAYBE 15 seconds for my bags to go through x-ray. Entire time from the credential check point to past the entire security area was under 60 seconds. This was VERY cool.

Other than having an overly confusing enrollment process, it was worth the streamlined security line process. I look forward to seeing this rolled out into more of the airports that I travel through.

If you’re with another airline and have gone through the process, let me know your experience.

Categories: Personal Tags:

What to Expect at Your First MVP Summit

January 2nd, 2012 24 comments

Every year, there is a flurry of questions from newly minted MVPs about the annual MVP Summit. This year, more than 1,400 MVPs from 70+ countries will attend more than 700 sessions behind closed doors. As a veteran of nearly a dozen Summits, I’ve created this post to answer the commonly asked questions. Hopefully, it should provide a good bit of info on what to expect. Feel free to ask questions and/or post suggestions and ideas in the comments below. This is a living post.

Keep your MVP profile updated!

I can’t recommend enough about having your MVP profile up to date, especially the “Expertise and Interests” section. This section dictates what session areas you may attend at the Summit. Update it NOW! Also, other MVPs can use your profile to contact you. The first year I attended, I viewed the profiles of other MVPs in my expertise (Exchange, at the time) to learn more about my colleagues. I’ve also had some recruiters and potential customers call after viewing my profile. The MVP profile can be quite beneficial.

What to bring

Here is a list of things of the minimum items you should consider bringing:

  1. Camera – You’ll be meeting a lot of people, putting faces to names. There are a lot of social events and social networking opportunities in which to record the moment. Plus, there are some nice places to visit, or take pictures of, such as Mt. Rainier, Pike’s Place Market, etc.
  2. Business cards – As mentioned above, you’ll be meeting lots of people. If you’re in sales, tread lightly on the marketing push. Stick your cards (and any you receive from others) in the back of your Summit ID holder for easy access throughout the Summit. Don’t have business cards? Places like VistaPrint will print cards for you for as little as $10 USD.
  3. Cold weather clothing – Seattle weather during the Summit time frame can be predictable (rain), and unpredictable (snow). It can be fairly cold during the time of the Summit. Dress in layers to survive. Here is the weather forecast for the area.
  4. A tip from @NikitaP: Wear comfortable shoes. I agree. You’ll do a fair amount of walking, and LOTS of socializing while standing at the various events and venues.
  5. A suitcase with extra space. You’ll get a Summit shirt, you’ll go to the company store, and some product groups give out gifts. There is also the public Microsoft Store at the Bellevue Square, a nice mall near the Summit hotels.
  6. Laptop or iPad for taking notes during technical sessions and keynotes. I recommend Microsoft OneNote, which is available on both the PC and iOS platforms, and runs great on tablets.
  7. If you’re coming from another country, bring a suitable power adapter to use for your gear in the U.S. If you run a Mac, check out the Plug Bug World. It converts your stock Apple MagSafe power adapter to be world-wide compatible. Plus, it adds a USB charging port. I love mine.
  8. Your MVP number. If Microsoft hasn’t received your signed NDA form yet, you may be required to sign one before you’re allowed into the event. The form requires your MVP number.
  9. If you’re from outside the country, check your cell phone’s data plan and roaming limitations. Don’t get caught with an unexpected costly mobile bill.

Arrive early, stay late – dinners, parties and extra events

I recommend padding the summit time frame by a day on each end to allow for extra sight-seeing, additional events, and shopping. Some product groups will have extra sessions, and those take place before or after the regular summit days. If your product group is doing this, you’ll know in advance.

There is a Welcome Reception, a product group event (usually a dinner event), and generally some third-party events like Party with Palermo (a developer based event). In previous years, there was also an Attendee Party. Many of the various groups informally meet at local establishments during the evenings, as well. You’ll stay busy at this event, I guarantee!

Increasingly over the past few years, Twitter has been a busy tool for keeping track of your friends and colleagues at Summit. It’s a great tool for figuring out what trendy bar all of your mates are at.

See the list of official events at https://www.mvp.microsoft.com/en-us/Summit/Agenda.

Keynote speeches

Note: There are no scheduled keynotes for Summit 2016. This section is merely for reference.

There are Q&A sessions at the end of each keynote. Here are some guidelines that will avoid people throwing things at you (or at least letting out a groan):

  1. Introduce yourself with your name and MVP area. Avoid anything else.
  2. Make it quick – ask a single question. I’m reminded of the scene in “Back to School” with Rodney Dangerfield where the professor says he “has but one question – in 27 parts”. Don’t hog the time, others have questions, too.
  3. And I hate to say this, but the fact is, if your English isn’t very strong, consider having someone else ask your question, or don’t ask at all. Keynotes are always in English. Every year, someone will ask some questions that very few people can understand due to a language barrier. That leads to awkwardness and unanswered questions.
  4. Don’t ask deep technical questions. The people giving the keynote and answering questions aren’t likely going to know WHY Exchange isn’t running on SQL.
  5. Don’t ask for autographs or selfies.
  6. Don’t bring things to give to them. Those crazy Canadians started that and it got out of control one year (although they do look sharp in their red hockey jerseys).

Engaging the product group

There are some opportunities to engage the product group for your area of expertise. This includes during technical sessions, product group events like dinners, as well as unofficial events. Keep in mind that interaction with the product group should be handled professionally. While it’s important to discuss concerns, please respect their time and efforts. Remember, having access to the product group is a privilege, and you’d be surprised how quickly they stop answering your questions and requests for help if you’re constantly (or worse, publicly) berating of their accomplishments. Also keep in mind that not every person in the product group happens to be in the Redmond area during the Summit time frame. So don’t get angry if the person responsible for your favorite (or despised) feature isn’t there.

Company store

There is an opportunity to take a trip to the company store. It is located right where the hotel buses drop you off on campus. You’re generally given a voucher when you pick up your credentials that allows you to spend up to a specific amount ($120 USD) OF YOUR OWN MONEY on licensed materials such as hardware and software. These are regular consumer products available at employee pricing. You cannot exceed the amount on the voucher, so don’t think you’re gonna get an Xbox console on the cheap. The voucher is generally valid to purchase from a special site online as well (for a limited time), and have the items shipped to you. In the past, if you use part of the amount on your voucher, they take the voucher, and you can’t use “what’s left” of it. Choose accordingly.

You can purchase as much as you want of the other items, including clothing, bags, books, novelties, and other swag. As mentioned above, plan accordingly. Make sure you have room in your suitcase to take the stuff home. Nothing worse than getting a killer deal on something, then having to pay to check another bag on your flight home.

For more information, see the official FAQ section on the company store.

Internet access

Here’s the bad part. The WiFi inside the Microsoft buildings can be sporadic due to the sheer demand, although it has been getting better in recent years. If you can tether via cell phone, or you have an air card/MiFi, keep those handy. Don’t plan on streaming videos, and even doing VPN connections can be very problematic over the guest WiFi. The hotels provide complimentary WiFi in the guest rooms and common areas.

Dress code

There isn’t one. Casual is generally what people wear, with the majority wearing jeans & button down shirts, or golf/polo shirts. Many people wear shirts and jerseys from previous Summits. See my comments above about dressing warm.

Car rentals

Don’t bother. It’s too expensive, and, unless you plan on doing a bunch of tourist stuff, you won’t use it. Keep in mind that hotels will charge you a horrendous fee to park each night. Shuttle buses will take you from official Summit hotels to official Summit events, such as sessions on campus, the Welcome Reception, etc. In the Seattle, Redmond, and Bellevue areas, Uber is very well established. If you’ve never used Uber before, there is one thing to remember. You can’t tip from within the Uber app. Some people don’t tip, others tip in cash.

Transportation

From the airport, take a taxi or shuttle bus. Many people will coordinate with others and split the bill. Some people recommend the Gray Line, and I’ve used Shuttle Express which typically makes stops at all of the hotels used by Summit attendees. I believe one-way trips are in the $20 range for both. It can easily take 30 minutes (with average traffic) to get from the airport to the hotels.

As mentioned previously, transportation to/from hotels and official Summit locations, including the Attendee Party, is provided by Microsoft. I believe information about that is listed on the Summit website. Many of the “hangouts” in the Bellevue area are all within walking distance from the hotels.

For more information, see the official FAQ section on transportation.

Social networking, NDAs, and such

It’s generally acceptable to mention where you are (check-in). But you are under NDA during the technical sessions, so don’t even THINK about posting ANYTHING you see or hear during official events such as keynotes, sessions, official events, etc. Microsoft monitors social networks during the event, and people have lost their MVP status in the past for tweeting/posting info that was covered by NDA. I would recommend not discussing technical information in public areas, either. Even product code names and internal reference names are taboo in public. I mentioned near the top about bringing cameras. Tread lightly here.

Previously, I’ve seen people win items simply by checking in via Foursquare when going to the public Microsoft Store. There is also a downtown Seattle badge on Foursquare.

Also, the MVP program has Facebook and Twitter feeds to follow (including the #MVP18 hashtag for the Summit, and #MVPBuzz for the program in general). The MVP program also has a blog.

Hotels

If you’re rooming with someone you haven’t roomed with before, and you snore, buy your roomie some drinks. Someone suggested bringing tennis balls they can lob at you to help stir you a little. Interesting suggestion.

Places of interest

Space Needle – Part of the Seattle skyline, visit the Space Needle and see forever from the observation deck.

Puget Sound Tour – This water based tour goes around Puget Sound and shows the visitor many interesting points of history, including the residence of Mr. Bill Gates.

The Museum of Flight – One of the MVP Summit events was held here a few years ago. Very fun and interesting. See a lot of airplanes from various generations and purposes.

Underground Tour – The Bill Speidel Undeground Tour is a leisurely, guided walking tour beneath Seattle’s sidewalks and streets. As you roam the subterranean passages that once were the main roadways and first-floor storefronts of old downtown Seattle, our guides regale you with the stories our pioneers didn’t want you to hear. It’s history with a twist!

Pike Place Market – See the fish throwing, visit the various markets, and have some food with a great view.

Misc

A great tip from @callkathy – Connect with people outside your expertise. Sit with other people on the bus and at meals.

Another great tip, this one from @AlvinAshcraft – Use FourSquare to find other MVPs.

Microsoft has a pretty decent FAQ page that answers many questions. Check it out.

Have fun!

You will meet new friends, technical contacts, and people who will help you succeed. You’ll finally be able to put faces to the names of people whose blog and Twitter feeds you follow.

If you have any questions about the Summit, please feel free to contact me on Twitter (@PatRichard). Have fun!

Categories: Personal Tags: ,

Review: Microsoft Touch Mouse

October 12th, 2011 No comments
Microsoft Touch Mouse

Microsoft Touch Mouse

My favorite mouse is the Microsoft Presenter 8000 mouse. It’s comfortable, gets great battery life, and has the presentation buttons and laser pointer built into the bottom. Unfortunately, after many many trips through airports, my mouse finally died.

I decided to see what else was available. I’d tried the Microsoft Arc mouse, but didn’t find it that comfortable, and the “back” button on the side wasn’t in an ideal location, and was quite stiff. A colleague had reported that the newer Arc Touch mouse was kinda cool, but he didn’t like it after trying it.

Microsoft recently released the Touch Mouse. This is a uber cool mouse that has no real buttons on the top or sides. It uses finger gestures and the entire top is a giant button. The unit supports one, two, and three finger gestures in a variety of directions, as well as thumb gestures in two directions. The unit includes a micro dongle that stores in the bottom of the unit. It is powered by two AA batteries, and has an on/off switch on its belly.

Setup was a breeze. The mouse is designed specifically for Windows 7. I inserted the dongle, and within seconds, a tutorial popped onto the screen demonstrating the various features and gestures. It walks you through each gesture, shows you what it controls, and then has you do the same thing to get the hang of it. I found the tutorial to be the perfect combination of information and length. There are certainly a lot of gestures you can use. Single finger gestures include the normal scrolling up, down, and sideways. Two finger gestures include docking apps to the left and right side of the screen, restoring and maximizing apps, etc. Three finger gestures include minimizing and maximizing all apps. And the thumb gestures work great for forward/back movements, such as those in your Internet browser. Button clicking is based on which finger is touching the unit when you press the forward part of the unit down.

This is a nice mouse. It works great, although it did take some getting used to when I needed to right-click on things. I’m not sure how often I’ll use some of the gestures, but it’s nice to see the availability of them. Scrolling up and down really gets going if you swipe quickly, and lift your finger off the unit – something else I had to get used to since I typically used a wheel that would only turn so far when I’d let go of it.

The $50 mouse was a great addition to my travel tech gear. It would have been nice if it came in a plastic shell, like the Presenter Mouse does. I just use the cloth pouch from the Arc mouse and it works great. I’d recommend the mouse if you’re looking for something slick. I think I’ll get another one for my desktop at home.

Categories: Personal Tags:

Review: Toshiba 14 Inch USB Monitor – Perfect for Travelling

October 11th, 2011 No comments
Toshiba 14" USB monitor

Toshiba 14″ USB monitor

These days, I spend more time at client sites than I do in my home office. My home office has four monitors for my desktop. When at a client site, I’ve been stuck with just a single screen for my laptop. This can be tough getting used to, and be quite limiting.

Toshiba came out with the perfect solution. Their $200 14″ USB monitor that folds completely flat, and takes up less room than my laptop in my backpack.

The monitor comes with a dual plug USB cable to ensure that it gets enough power to operate. From my Dell Precision M4500, I find that it gets enough from just one port. I keep the original cable in my backpack, and use just the Griffin mini USB to the monitor. This is essentially a 2″ cable that works perfectly. Toshiba does sell an optional power supply, but I’ve yet to find a need for it.

The screen gives me 1366 x 768 resolution, and provides perfect screen real estate to keep my Outlook and other apps open while I use the laptop’s main screen for my current focus, such as documents, etc.

Setup of the monitor each day is trivial. Open the unit like a book, close the flap, and stand it up. Connect the USB cable, and you’re done. Initial setup merely required the CD-ROM for the drivers, and took only seconds. From unboxing to operational took me less than five minutes. Front panel controls include power and brightness controls. There is a little velcro flap in the middle of the case to store the cable.

I absolutely love this monitor. It provides extra working room for me to be more efficient. It takes up very little space and adds very little weight (3.7 pounds) to my overall carry load. Setup is a breeze, and the unit just works.

The only thing I could complain about is that the bezel along the bottom, which includes the control buttons, is a bit large. It would be nice if it were smaller, and provided more screen space instead. But that’s trivial.

I would recommend this unit to anyone who would like to have more working room, but need to travel with it. It’s available from Amazon.

Categories: Personal Tags:

Awarded MVP Award for Exchange Server. Sixth Year in a Row!

October 1st, 2011 2 comments

Microsoft Most Valuable Professional

I found out today that I’ve been awarded the Microsoft Most Valuable Professional (MVP) award for the sixth straight year. I’m quite honored to receive this award, and truly enjoy the benefits it brings.

For those who are unfamiliar with the MVP award, it is recognition from Microsoft for exceptional technical leadership in the community. MVPs are awarded in only a single area of expertise (mine being Exchange). I am a regular contributor to online communities such as TechNet and Tek-Tips, print publications such as books, and blogs such as this one. I truly enjoy doing it, and it’s always nice to be recognized for the efforts. Some MVPs are public speakers at conferences and write articles in technical publications. One cannot apply to be an MVP, nor can you take a test. You have to be nominated. I still am not positive as to who originally nominated me years ago. Soliciting for an MVP award is generally frowned upon.

Among the benefits that MVPs enjoy is unmatched access to the product groups within Microsoft, access to technical information not available publicly, as well as software and support benefits. The recognition goes far and wide, including benefits from outside vendors, as well as interest from larger organizations and recruiting firms. Think I’m exaggerating? My current employer CAME TO ME while I was working elsewhere, based on online contributions and reputation in the technical community. An MVP award has a substantial positive impact on your career.

MVP awards are granted during 4 cycles each year, and an MVP award is good for one year. So, no slacking here! To stay an MVP, you must continue to contribute in the technical community. The number of MVPs always fluctuates, as some are awarded only once, some join the mother ship (Microsoft) and have to forfeit their award, and some move to different areas of expertise. From what I’ve been able to gather, there are generally around two dozen Exchange MVPs in the United States. Most of us know each other, and can reach out to one another, as well as the product group staff, when issues arise. This is truly the best benefit. Look at the various books, magazine articles, blogs, and seminars about Exchange, and nearly all are written by MVPs. This includes Jim McBee, Tony Redmond, Devin Ganger, and others. See the Blog links section on the right side of this site for links to many MVPs.

I’ve made some great friends during these years. Some are no longer MVPs, but most still are. Some have been awarded for over a dozen years – a mind boggling thought. That’s a lot of forum posts, writing, and effort. Microsoft has a Global Summit once a year in Redmond, and many of us spend a lot of time at the Summit socializing and networking, which is not only fun from a professional level, but also a personal one. There are also deep technical sessions provided by those responsible for that particular area of the product. And we always meet MVPs in other areas of interest, such as Lync, Active Directory, etc.

Rest assured that my efforts to help in the community will continue for years to come.

If you’d like more information about the MVP program, see the Most Valuable Professional Overview page. To see my MVP profile, click the MVP logo in the right side of this site.

Thanks!


Categories: Exchange Server, Personal Tags:

My Travelling Tech Gear

September 25th, 2011 1 comment

While on a project, a bunch of us sat in the “war room” for more than 7 months. During the time, we often talked about various technologies, including what we carry with us from day-to-day. When someone would mention some cool gadget they had, of course, in short order, many others in the room would buy the same gadget. It gets contagious. So I thought I would list what I carry from day-to-day.

My backpack of choice is the Tumi Business Class Brief Pack. This is a durable Checkpoint Friendly backpack. If you’re not familiar with Checkpoint Friendly bags and backpacks, they are bags designed to help you breeze through airport security. They do this by keeping the laptop area completely separate from the rest of the bag. That area unzips partially from the rest of the bag so that while it’s going through the x-ray, it’s clearly visible.

I’m in airports about a hundred times a year, so not having to take out my laptop and put it into a bin by itself is quite convenient. The rest of the gear that gets crammed into the backpack includes:

  1. Lenovo X1 Carbon with an i7 processor and 8GB of RAM. This thing has a 256GB SSD. It’s MUCH lighter that my previous beast.
  2. Toshiba 14″ USB powered monitor. This is one of the best items I’ve purchased. This gives me a multi-screen solution while at customer sites.
  3. Bose QC20 noise cancelling earphones. These replaced my QC3 headphones just to conserve space and weight.
  4. Microsoft Touch Mouse. One, two, and three finger gestures.
  5. Satechi Portable Energy Station. Always convenient to recharge things like the iPad, Kindle, or cell phone when in an area that has no outlets, like smaller airport terminals.
  6. Griffin Technology USB mini-cable set
  7. 6′ stereo audio cable
  8. 6′ HDMI cable. Great for watching movies from the laptop on the hotel TV.
  9. Bose MIE2 earphones. Great for listening to hair metal, or taking the occasional call. These are very comfortable, and are my headset of choice for long cell calls.
  10. An audio “Y” cable
  11. A Square reader. This is perfect for when I need to perform a credit card transaction. Works great with the iPad. And it’s free.
  12. A pair of Oakley reading glasses
  13. 12′ CAT6 LAN cable (that rarely gets used)
  14. A small prescription bottle with meds and various medical remedies like Aleve and cold/sinus medication.
  15. CountyComm Compact Battery Holder with 4 AA batteries for my mouse.
  16. 2 Sandisk 32GB thumbdrives. One is bitlocker encrypted (just like my laptop drives). The other is a bootable Win 8.1 unit that also has all of my laptop software in case I need to reload on the road (which happened once when the primary SSD on my Dell laptop failed).
  17. A  compact Microsoft 3 port surge protector. It’s small and comes in handy in conference rooms where there are never enough outlets, as well as in areas where power can be unpredictable.
  18. 3x Startech 6″ USB Micro cables.
  19. 2x Startech 6″ USB Mini cables.
  20. 3′ USB extension cable
  21. Jabra Speak 410 Bluetooth speakerphone that also works great as a microphone into Microsoft OneNote.
  22. Platronics Voyager Legend Bluetooth headset. REALLY cool unit that even recharges in the case!
  23. 13″ Apple MacBook Pro w/ Retina Scan
  24. Apple Magic Mouse
  25. PlugBug World
  26. The Ethernet dongle for the X1
  27. Hardware tokens including RSA, and the one for my code signing certs
  28. A couple of small screwdrivers that fit the tiny screws on laptops
  29. An SD card reader
  30. A small card/organizer that has membership cards for all of my travel accounts, including air, hotel, rental car, etc. I also keep all of my courtesy coupons in there.
  31. A small micro-fiber cloth and small brush to keep the laptop screen and keyboard clean.

Many of the cables and small items are attached to a Cocoon GridIt to keep them organized, as well as keeping them somewhat flattened out to make it easier for TSA to see things on the x-ray. The GridIt comes in a ton of various sizes.

Some things that are usually in my roll-aboard (summer) or Scottevest Fleece 5.0 (24 pockets – spring/fall) or Scottevest Revolution jacket (26 pockets – winter) include

  1. Sony Cyber-shot DSC-H55 digital camera

The only reason these last items aren’t in my backpack isn’t because of space. It’s TSA. Too much gear crammed into the compartments of the backpack makes it hard for the TSA folks to get a clear view via X-ray, and results in having to remove some items and have the backpack rescanned. That’s of course, counter-productive to having this particular backpack. I don’t use either of these too often, but keep them handy just in case. The items in my backpack are carefully placed in specific locations to avoid TSA issues. I have, however, been asked by TSA several times about the Toshiba monitor. It folds pretty flat, and some agents are just intrigued by it.

And items that are always in my roll-aboard:

  1. 2nd power supply for the laptop
  2. power supply for the Surface Pro

These are generally used in my hotel room. If I’m on a long-term project and have a dedicated seat or cube, I often bring a Dell docking station to leave at the site with a power supply. This makes things more convenient.

Yes. The backpack is heavy. But that really doesn’t bother me, and I sometimes walk 1/2 mile or more from a hotel to a client site.

Some things that have previously been in my backpack, but have been replaced by other gear:

  1. Dell Precision M4500 laptop. It has an i7 processor, 16GB of RAM, and two SSD drives. The 15.6″ screen works great. A 3M privacy screen helps when using the laptop in an airport or on a plane.
  2. iPad 64GB 3G. This will likely be replaced soon with a Samsung Series 7 slate running Windows 8.
  3. Kindle DX. This is the larger screen model which is great for reading tech books with screenshots.
  4. Polycom CX100 USB speakerphone. I use this for Lync calls occasionally.
  5. Jawbone Jambox (Black Diamond). This is relatively new to the backpack. Great sound and much more convenient when on conference calls, or when calling PSS.
  6. Plantronics Voyager Pro+  wireless headset.
  7. Kindle cable and AC adapter
  8. FitBit base station
  9. A super small microphone. This plugs into the laptop, and is used by OneNote when I’m at conferences to capture the presenter’s voice while I take notes.
  10. Garmin nuvi 680 GPS and car mount
  11. Bose Bluetooth headset
  12. Bose QuietComfort 3 noise cancelling headphones
  13. 6′ VGA cable.
  14. A Verizon 4G/LTE MiFi that gets used heavily. I use this at conferences (where WiFi can be sporadic at best), in hotel rooms (for connectivity for laptop and tablet), and client locations where the MiFi might provide quick, unfiltered Internet access.
  15. Plantronics .Audio 470 USB headset. Perfect for long calls. Long cable, audio in both ears, comfy….
  16. Microsoft Surface Pro w/ 64GB microSD card and type cover

So, what am I missing? If you have a piece of gear that you simply can’t live without when traveling, comment below.

Categories: Personal Tags:

Office Speaker Setup

September 25th, 2011 No comments

I was getting pretty tired of using the basement for my home office. The white noise from my server rack, as well as the noise from the washer and dryer, furnace, and other random things got old. And the cement floor was quite cold in the winter. So, I decided to hijack an unused bedroom and turn it into the dream office.

I figured if I was moving so that external noises weren’t an issue, I’d have to be able to create some of my own. With a ~5TB iTunes library, it’s obvious I like to listen to music. So premium sound was an absolute requirement.

I needed speakers that sounded great, but were not in the way. With a 4 monitor setup for my primary workstation, I didn’t want even more clutter. My monitors are mounted to two Ergotron DS100 dual monitor stands. One uses the grommet mount base through one of the holes in the desk. I knew there had to be a way to utilize the monitor stands for my speakers.

I spent some time at the local Bose store, and concocted a plan around the Companion 5 multimedia speaker system. The Companion 5’s main speakers are mounted to a small stand by a single screw on the back. I removed the screw and stand. Next, I took some normal hose clamps and drilled a single hole through them big enough for the screw. Then I took the original screw, threaded it through the hole in the clamp, and back onto the speaker.

Next, I took some normal foam tubing, like that used to insulate home water pipes, and cut two 2″ pieces. I took one piece, wrapped it around the vertical base of the monitor stand, then put the hose clamp connected to the speaker around that. Essentially, I was putting some padding between the hose clamp and monitor stand. This was for two reasons. The first is that the monitor stands aren’t cheap, and I didn’t want to scratch them up if my genius idea didn’t work. The second was that I like to listed to my hair metal LOUD. I didn’t want any rattling or things loosening up.

After some tweaking and adjusting, the idea worked perfectly. I used some Velcro cable straps to keep the cables at bay. Other than the speakers, I spent about 5 bucks on the foam tubing, Velcro, and hose clamps.

Left speaker, as seen from just above desktop level

Left speaker, as seen from the side. Note hose clamp and foam tubing

Right speaker. This uses the normal base since there was no hole in the desk. Note iPod and iPhone cradles, and speaker pod.

Full view of both speakers, and all four monitors.

Categories: Personal Tags: