One Liner: Enable Windows Explorer preview of PowerShell Files

July 14th, 2016 No comments

I really like the Preview Pane in Windows Explorer. It saves me from having to open files in their default app. The problem is that PowerShell files are not visible in Windows Explorer by default. And if you’re like me, you probably often look for code snippets in your .ps1 files. That’s pretty easy to fix, however, with a single line entered in an elevated PowerShell session utilizing the Set-ItemProperty cmdlet:

Set-ItemProperty Registry::HKEY_CLASSES_ROOT\.ps1 -Name PerceivedType -Value text

What this does is tell Windows Explorer to treat .ps1 files as text.

What I’ve done is add that in my PowerShell profile. My PowerShell profile is stored on OneDrive, and every machine I have references that same profile file. So, no matter what machine I’m on, I get the same experience, including the preview of PowerShell files. However, you must run it in an elevated session. So in my profile, to prevent errors, I check to see if the session is elevated, and if it is, set the property. It’s easy with:

if ((New-Object Security.Principal.WindowsPrincipal $([Security.Principal.WindowsIdentity]::GetCurrent())).IsInRole([Security.Principal.WindowsBuiltinRole]::Administrator)) {
  Set-ItemProperty Registry::HKEY_CLASSES_ROOT\.ps1 -Name PerceivedType -Value text
}

Now some of you will quickly note that only .ps1 files are included in my example. But PowerShell can also include .psm1 and .psd1 files as well. Can we still accomplish handing all three extensions in a single line of code? Absolutely. We can use Get-Item with the Include parameter to retrieve info for all three extensions, and then pipe that to Set-ItemProperty. Here’s an example:

Get-Item Registry::HKEY_CLASSES_ROOT\* -Include .ps1,.psd1,.psm1 | Set-ItemProperty -Name PerceivedType -Value text

And of course we can wrap this with the previously mentioned elevated check:

if ((New-Object Security.Principal.WindowsPrincipal $([Security.Principal.WindowsIdentity]::GetCurrent())).IsInRole([Security.Principal.WindowsBuiltinRole]::Administrator)) {
  Get-Item Registry::HKEY_CLASSES_ROOT\* -Include .ps1,.psd1,.psm1 | Set-ItemProperty -Name PerceivedType -Value text
}

I’ll be writing about more things in my PowerShell profile in the coming weeks. I welcome comments and suggestions, including things you include in your profile to help your productivity.

Categories: PowerShell Tags:

One Liner: Add Trusted Root Cert Authorities to Edge Servers

September 19th, 2015 5 comments

Chris Hayward (@WeakestLync) wrote a great blog post with a neat & easy way to add trusted root certificates for your edge servers. Of course, everything in Lync and Skype for Business uses certificates, so ensuring you have all of the certificates is crucial for federation with other organizations.

Once I saw Chris’s method, I, of course, thought that PowerShell could do this as well. Voila, a one-liner to do it. This example uses the same list from Chris’s blog post, and suppresses the output so you can use it your provisioning scripts.

'https://comodo.com', 'https://digicert.com', 'https://www.entrust.net', 'https://geotrust.com', 'https://www.globalsign.com', 'https://godaddy.com', 'https://www.symantec.com', 'https://thawte.com', 'https://wisekey.com' | ForEach-Object {$null = Invoke-WebRequest -Uri $_}

This method essentially just cycles through each item in the array, and does a web request for each. As each web request is completed, any new certificates are automatically added to the trusted root cert store. Usually, some of these already exist, so don’t be surprised if the total certificate count doesn’t increase by the same number of items in the array.

One liner: Find Lync/Skype for Business Users Whose Extension Doesn’t Match Part of Their DID

September 18th, 2015 2 comments

Description


Get-CsUser -Filter {LineURI -ne $null} | Where-Object {$_.LineURI.Split("=")[1] -NotMatch $_.LineURI.Substring($_.LineURI.Split(";")[0].Length -4,4)} | Select-Object DisplayName,LineURI | Sort-Object DisplayName

Script: Install-OfficeWebAppsLanguagePacks.ps1 – Easier Installation of Selected Language Packs

March 7th, 2015 No comments

PowerShell-logo-128x84Description

I was working with a global customer lately who has datacenters in various global regions (as most global orgs do). The customer had not decided, and basically, hadn’t even thought about what language packs to install on their Office Web Apps Servers (OWAS). I suggested that there are 49 language packs including the English pack that I install by default on every OWAS server. Those languages are:

Azeri (Latin)
Basque
Bosnian (Latin)
Bulgarian
Catalan
Chinese (Simplified)
Chinese (Traditional)
Croatian
Czech
Danish
Dari
Dutch
English
Estonian
Finnish
French
Galician
German
Greek
Hebrew
Hindi
Hungarian
Indonesian
Irish – Ireland
Italian
Japanese
Kazakh
Korean
Latvian
Lithuanian
Macedonian (FYROM)
Malay (Malaysia)
Norwegian (Bokmal)
Polish
Portuguese (Brazil)
Portuguese (Portugal)
Romanian
Russian
Serbian (Cyrillic)
Serbian (Latin)
Slovak
Slovenian
Spanish
Swedish
Thai
Turkish
Ukranian
Vietnamese
Welsh

The customer decided on which language packs to install.

If you’ve ever tried to install these, you know you go to the language pack download page, and pick your desired language. When the next page comes up, you notice that it’s in the language of the desired language pack. You hope you’re clicking on the right link, download the file, then run the installer, which is mostly in the desired language, and go from there. It can be somewhat confusing, but extremely repetitive – especially if you’re installing a lot of language packs. It got me thinking that this was an area ripe for automation (what area isn’t?).

Well, as I’ve mentioned on this blog before, I’m lazy (as most coders are). So I wrote this script to make my life easier, and as a result, you gain from it. Here’s what the script does:

  1. Detects which (if any) language packs are installed on the local machines. This is accomplished by looking for the correct GUID in the Uninstall branch of the registry.
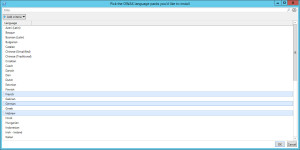
  2. Displays a grid list of the language packs that are available and not already installed on the machine (see image below). You can select one or more language packs to install and click “Ok”.
  3. The script will download the language pack(s)
  4. It will mount (if they are an .img file), or extract (if an .exe).
  5. It will silently install the language pack
  6. It will clean up after itself (unmount or clean up extracted files)

Here is the selection list presented. Notice that English is not in the list as that language pack is already installed.

OWAS language pack selection

Once installation is completed, you’re left with your language packs installed and a nice little log file.

OWAS post installation

Extract the files to any folder. The script and the .csv file MUST be in the same folder. Run it by calling Install-OWASLanguagePack.ps1 and it will default to using the following path structure (which it will create if it doesn’t already exist):

Path Purpose 
c:\_Install Root working folder. Can be changed using -TargetFolder when calling the script.
c:\_Install\logs Log files from the script are stored here
c:\_Install\OWASLanguagePacks Downloaded language pack files are stored here. Folder name can be changed using -OWASLanguagePackFolder. Language packs are placed in sub folders of this folder. The sub folders match the language of the language pack.

A little bit of a rant. I *REALLY* wish the language packs were an MSI file that supported silent install instead of an .img file that must be mounted or an .exe that must be extracted, and then each called with complex syntax.

Syntax

Install-OWASLanguagePacks.ps1 [[-TargetFolder]][[-OWASLanguagePackFolder]] [-WhatIf] [-Confirm] [-IncludeTotalCount] [-Skip] [-First][<commonparameters>]

Installation

Execution Policy: Third-party PowerShell scripts may require that the PowerShell Execution Policy be set to either AllSigned, RemoteSigned, or Unrestricted. The default is Restricted, which prevents scripts – even code signed scripts – from running. For more information about setting your Execution Policy, see Using the Set-ExecutionPolicy Cmdlet.

Donations

I’ve never been one to really solicit donations for my work. My offerings are created because *I* need to solve a problem, and once I do, it makes sense to offer the results of my work to the public. I mean, let’s face it: I can’t be the only one with that particular issue, right? Quite often, to my surprise, I’m asked why I don’t have a “donate” button so people can donate a few bucks. I’ve never really put much thought into it. But those inquiries are coming more often now, so I’m yielding to them. If you’d like to donate, you can send a few bucks via PayPal at https://www.paypal.me/PatRichard. Money collected from that will go to the costs of my website (hosting and domain names), as well as to my home lab.

Assumptions

None

Download

v1.0 – 03-07-2015 – Install-OWASLanguagePacks.v1.0.zip

Changelog

See the changelog for information on what’s changed/included in each version.

Changelog: Install-OfficeWebAppsLanguagePacks.ps1

March 7th, 2015 No comments

This is the changelog page for Script: Install-OfficeWebAppsLanguagePacks.ps1 – Easier Installation of Selected Language Packs. You will find a complete list of released versions, their dates, and the features and issues addressed in each. Please refer to the script’s main page for more information including download links, installation details, and more.

v1.0 – 03-07-2015

  1. Initial version
Categories: PowerShell Tags:

One Liner: Set-TaskbarGrouping – Configure Desktop Taskbar Grouping

February 18th, 2015 No comments

In One Liner: Configuring Shutdown Tracker in Windows Server I mentioned that it’s often preferable to quickly configure some server settings when building servers. As a consultant, I like to set up my server profile when building servers in a manner that’s efficient and convenient for me. One thing that drives me completely insane is the default taskbar group setting. Taskbar grouping is how Windows groups common items together on the taskbar. By default, all similar items are lumped together, i.e. all Internet Explorer windows. So to go back to an IE window could take two mouse clicks instead of one. Let’s take a look at streamlining this configuration for Server 2012 and Server 2012 R2.

Taskbar grouping has three settings. The default “always combine” mentioned previously, “combine when taskbar full” which doesn’t start grouping until there are enough items to fill the taskbar, and my favorite, “never combine”. As you can probably guess, “never combine” doesn’t group taskbar items at all. Since I usually don’t have more than 4 or 5 apps open when building servers, this suits my style.

Just like the shutdown tracker, this setting is stored in the registry. A one liner for this would look like this:

Set-ItemProperty -Path 'HKCU:\Software\Microsoft\Windows\CurrentVersion\Explorer\Advanced' -Name TaskbarGlomLevel -Value 0

0 is the value for “always combine”, 1 for “combine when taskbar full” and 2 for “never combine”. In order for the setting to take effect, one of two things has to happen. Either log off/restart, or restart the explorer.exe process. The later can be performed by running the following:

Stop-Process -ProcessName explorer -force

If you’d like to use a function for this, we can use something like the code below in our server build script:

function Set-TaskbarGrouping {
    [CmdletBinding(SupportsShouldProcess, SupportsPaging, DefaultParameterSetName = 'NeverCombine')]
    param(
        # Always combines similar shortcuts into groups
        [Parameter(ValueFromPipelineByPropertyName, ParameterSetName = 'AlwaysCombine')]        
        [switch] $AlwaysCombine,
        
        # Combines similar shortcuts into groups only when the taskbar is full
        [Parameter(ValueFromPipelineByPropertyName, ParameterSetName = 'CombineWhenTaskbarFull')]
        [switch] $CombineWhenTaskbarFull,
        
        # Never combines similar shortcuts into groups
        [Parameter(ValueFromPipelineByPropertyName, ParameterSetName = 'NeverCombine')]
        [switch] $NeverCombine,
        
        # Restarts explorer in order for the grouping setting to immediately take effect. If not specified, the change will take effect after the computer is restarted
        [switch] $NoReboot
    )
    switch ($PsCmdlet.ParameterSetName) {
        'AlwaysCombine' {
            Set-ItemProperty -Path 'HKCU:\Software\Microsoft\Windows\CurrentVersion\Explorer\Advanced' -Name TaskbarGlomLevel -Value 0
        }
        'CombineWhenTaskbarFull' {
            Set-ItemProperty -Path 'HKCU:\Software\Microsoft\Windows\CurrentVersion\Explorer\Advanced' -Name TaskbarGlomLevel -Value 1
        }
        'NeverCombine' {
            Set-ItemProperty -Path 'HKCU:\Software\Microsoft\Windows\CurrentVersion\Explorer\Advanced' -Name TaskbarGlomLevel -Value 2
        }
    }
    if ($NoReboot){
        Stop-Process -Name explorer -Force
    }else{
        Write-Verbose -Message 'Change will take effect after the computer is restarted'
    }
} # end function Set-TaskbarGrouping

I use parameter set names so that only one of the parameters can be used when the function is called. The three options are “NeverCombine” “CombineWhenTaskbarFull” and “AlwaysCombine”. But since I define the parameters in a param block, you get tab completion. So no need to even remember the options. For example:

Set-TaskbarGrouping -NeverCombine

If you also include the -NoReboot parameter when calling the function, it will restart explorer.exe to avoid the need to log off/restart.

One Liner: Configuring Shutdown Tracker in Windows Server

February 17th, 2015 3 comments

When you spend time building servers, there are often some minor tweaks that you use to make life easier. In many environments, Group Policy Objects (GPOs) are used to configure these settings. But in a lot of environments, that’s not the case. If you build a lot of servers, you may have some scripts to help streamline the process. I often see this being the case among consultants who are engaged to deploy a solution. If you’ve followed my blog for a while, you know that’s what I do. And I look for many ways to streamline the deployment. Many solutions I write are all about the actual deployment, whereas this particular post is about the working environment I’ll be spending time in.

One thing that always drives me nuts is the Shutdown Tracker. That’s the little dialog box that pops up when you want to restart or shutdown a server. You’re presented with a prompt to pick the reason why you’re restarting or shutting down. While this can certainly have its place in an enterprise environment, it’s not generally needed during a deployment. And it’s not likely needed in a lab environment where you might be testing various configurations and restarting often. So let’s gag that annoying prompt.

To disable Shutdown Tracker, open an elevated PowerShell prompt and enter the following one line:

Set-ItemProperty -Path "HKLM:\SOFTWARE\Policies\Microsoft\Windows NT\Reliability" -Name ShutdownReasonOn -Value 0

This will take care of the problem. If you later want to enable the Shutdown Tracker, you can simply run it again, specifying a 1 for the value.

We can make this a little more flexible by creating a function to let us enable or disable as needed.

function Set-ShutdownTracker {
	[CmdletBinding(SupportsShouldProcess = $True, SupportsPaging = $True, DefaultParameterSetName = "disabled")]
	param(
		# Disable the shutdown tracker
		[Parameter(ValueFromPipeline = $False, ValueFromPipelineByPropertyName = $True, ParameterSetName = "disabled")]
		[switch] $Disabled,
		
		# Enable the shutdown tracker
		[Parameter(ValueFromPipeline = $False, ValueFromPipelineByPropertyName = $True, ParameterSetName = "enabled")]
		[switch] $Enabled
	)
	switch ($PsCmdlet.ParameterSetName) {
		"enabled" {
			Set-ItemProperty -Path "HKLM:\SOFTWARE\Policies\Microsoft\Windows NT\Reliability" -Name ShutdownReasonOn -Value 1
		}
		"disabled" {
			Set-ItemProperty -Path "HKLM:\SOFTWARE\Policies\Microsoft\Windows NT\Reliability" -Name ShutdownReasonOn -Value 0
		}
	}
} # end function Set-ShutdownTracker

And the script can be called with either the -Enabled or -Disabled parameters.

Adding the one liners or the function to your deployment scripts might make life a little easier.

Creating Desktop Shortcuts to Run PowerShell Scripts

February 16th, 2015 1 comment

PowerShell-logo-128x84Description

There are some really helpful scripts out there. Not just for Lync and Exchange. But many other apps and administrative tasks. Sometimes, however, the people who need to run them aren’t well versed in PowerShell. This makes is cumbersome for them to open PowerShell, navigate to a folder containing a script, and execute it with the correct parameters. This often leads to complaints about the difficulty of the process, or those admins just not using that tool. As not all admins have our PowerShell prowess, we can create a desktop shortcut that will allow an admin to simply double-click on it to execute it. Let’s see an example.

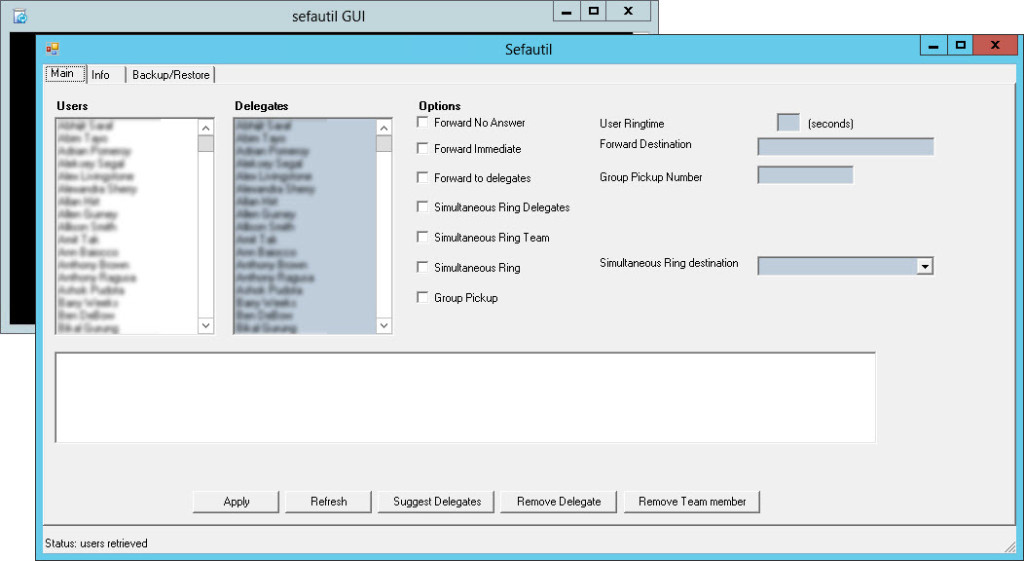
For this example, I’m going to use Johan Veldhuis’ very slick sefautil GUI, a wrapper for the Lync sefautil.exe program. Sefautil is a resource kit utility that allows an admin to set things like delegates, call forwarding, and other settings, on behalf of users. Sefautil has some really painful syntax, and a complete lack of error reporting. Using it is often frustrating. Johan’s GUI for it makes life SO much easier, that I found myself using it a LOT.

Let’s say, for the sake of this example, that the script, called sefautil_gui.ps1, is in a folder called c:\_scripts. When you execute Johan’s script, you must pass it a front end pool name using the “-pool” parameter. Normally running it would require something like the following:

.\sefautil_gui.ps1 -pool pool01.contoso.com

With a shortcut, we need to tell it to launch PowerShell, and call the script along with the parameters. The syntax is the full path to powershell.exe, along with the “-command” parameter and the syntax used for the script. The syntax is wrapped in quotes, and prefixed with an ampersand. PowerShell resides at C:\Windows\System32\WindowsPowerShell\v1.0\powershell.exe

  1. Right click on the desktop, and choose New>Shortcut.
  2. Enter a path for the shortcut. For our example, we’ll use
    C:\Windows\System32\WindowsPowerShell\v1.0\powershell.exe -command “& c:\_scripts\sefautil_gui.ps1 -pool pool01.contoso.com”
  3. Click Next.
  4. Give the shortcut a name. We’ll call it “sefautil GUI”. Then click Finish.

Let’s set the starting path. Right click on the newly created shortcut, and click Properties. Click on the Shortcut tab. In the “Start In” field, let’s set it to “C:\windows\system32\WindowsPowerShell\v1.0”.

You may have noticed that the shortcut has the PowerShell icon. While that’s all fine and damn sexy, we might want to change that. That’s simple enough since we’re already on the Shortcut tab, click the Change Icon at the bottom and choose whichever icon you’d like. For mine, I chose the Deployment Wizard icon. This is available by browsing to %ProgramFiles%\Microsoft Lync Server 2013\Deployment and choosing Bootstrapper.exe.

While Johan’s script is a GUI based script, many are not. If that’s the case, we can tweak the session settings a little further. On the Options tab of the shortcut, you can tailor settings like Quick Edit mode, which makes selecting, copying, and pasting easier. Obviously, the Font, Layout, and other tabs provide further control over the experience.

Also note that non-GUI scripts will close the PowerShell window when they are done running, so a script might need to be tweaked to pause before closing. YMMV.

Once you’re done, click OK. Voila!

sefautil GUI shortcut

Now, simply double clicking on our new shortcut launches the script.

sefautil GUI


I often do this for many 3rd party administrative tools, including Lync Call Pickup Group Manager, Lync RGS Holiday Set Editor, Centralized Logging Tool, and more.

Donations

I’ve never been one to really solicit donations for my work. My offerings are created because *I* need to solve a problem, and once I do, it makes sense to offer the results of my work to the public. I mean, let’s face it: I can’t be the only one with that particular issue, right? Quite often, to my surprise, I’m asked why I don’t have a “donate” button so people can donate a few bucks. I’ve never really put much thought into it. But those inquiries are coming more often now, so I’m yielding to them. If you’d like to donate, you can send a few bucks via PayPal at https://www.paypal.me/PatRichard. Money collected from that will go to the costs of my website (hosting and domain names), as well as to my home lab.

Categories: PowerShell Tags: ,

One Liner – See Number Of Connected Users, Endpoints On A Lync Front End Server

January 22nd, 2015 5 comments

A question went around an internal DL at work today asking if anyone knew off the top of their head the name of performance counters that show connected users and endpoints. While digging up the answer, I started thinking – this would be a great little one liner.

My esteemed colleague Ron Cook (@roncook925) beat me to supplying the answer to the DL question. The two counters are:

LS:USrv – Endpoint Cache\USrv – Active Registered Endpoints
LS:USrv – Endpoint Cache\USrv – Active Registered Users

Endpoints is always higher than users, in my experience. There are always some users who are connected via mobile devices and rich client, or via OWA, or LPE. So I like to query both.

PowerShell has a great cmdlet called Get-Counter which, as you can guess, can query performance counters. There’s a pretty good tutorial on how to retrieve perfmon counter data for Lync related counters by the Lync PowerShell group at Microsoft in How Do We Love Performance Counters” Let Us Count the Ways. So let’s take a look at how we can get the data we need.

In this case, we’ll query the two counters mentioned above with one line. This is supported in Get-Counter by just separating the counters with a comma. We’ll select an expanded property called CounterSamples, which holds the data we need (among other info). And lastly, we’ll output the path (counter name), and something called the CookedValue, which is the actual counter value contained within CounterSamples. I know, CookedValue sounds like it could be just made up numbers, like those you get from a shifty accountant. But it is truly the value we want.

Plug this into your console as one long line:

Get-Counter "\LS:USrv - Endpoint Cache\USrv - Active Registered Endpoints","\LS:USrv - Endpoint Cache\USrv - Active Registered Users" | Select-Object -ExpandProperty CounterSamples | Format-Table Path,CookedValue -Auto

That will give you a quick point-in-time snapshot of the number of users and endpoints connected to the front end, as shown below.

perfmon

The blurred text is just the front end name. If you’d like to query a remote front end, just tack on the ComputerName parameter, such as:

Get-Counter "\LS:USrv - Endpoint Cache\USrv - Active Registered Endpoints","\LS:USrv - Endpoint Cache\USrv - Active Registered Users" -ComputerName frontend.contoso.com | Select-Object -ExpandProperty CounterSamples | Format-Table Path,CookedValue -Auto

For those wondering why I’m using Format-Table and the -Auto parameter, it’s because the counter path value is so long that it would otherwise get truncated short enough to where you wouldn’t know which counter was tied to which value.

One Liners: Finding Elevated Accounts That Are Enabled For Lync & Skype for Business

November 18th, 2014 No comments

Lync 2013 logo 128x128One thing I see while doing Lync environmental health checks for some customers is some elevated accounts that are enabled for Lync. An example is members of the Domain Admins group. This can be somewhat problematic, especially for administration of those elevated accounts. For security reasons, it is not recommended to enable members of Domain Administrators group for Lync.

You cannot use Lync Server Control Panel to manage users who are members of the Domain Admins Active Directory group. For Domain Admins users, you can use Lync Server Control Panel only to perform read-only search operations. Attempting to perform write operations (such as enable or disable for Lync Server Control Panel, change pool or assigned policies, telephony settings, SIP address) on an elevated user will yield an “Access Denied” error. To perform write operations on a member of Domain Admins, you must use Lync Server Management Shell (PowerShell) cmdlets while logged on as a member of Domain Admins.

For more information please refer to this Microsoft page: User accounts enabled for Lync Server 2013

To query an elevated group, such as Domain Admins, for Lync enabled users, use the following:

(Get-ADGroupMember "Domain Admins").DistinguishedName | Get-CsUser -ErrorAction SilentlyContinue | Format-Table DisplayName,SipAddress

You can replace the “Domain Admins” with the name of any group, really. When you run it, you’ll end up with something like:

PS C:\> (Get-ADGroupMember "Domain Admins").DistinguishedName | Get-CsUser -ErrorAction SilentlyContinue | Format-Table DisplayName,SipAddress

DisplayName                                                 SipAddress
-----------                                                 ----------
Services                                                    sip:services@contoso.com
Dan Giles                                                   sip:dan.giles@contoso.com
Neil Armstrong                                              sip:neil.armstrong@contoso.com
Dawn Lopes                                                  sip:dawn.lopez@contoso.com
Bob Seger                                                   sip:bob.seger@contoso.com
Gail O'Grady                                                sip:gail.ogrady@contoso.com
Troy Dallas                                                 sip:Troy.Dallas@contoso.com
Steve Carrell                                               sip:steve.carrell@contoso.com

You can Lync disable these users for Lync, using the Disable-CsUser cmdlet. This can be done either individually using the -Identity parameter, or everyone at once by pipeline, with something like:

(Get-ADGroupMember "Domain Admins").DistinguishedName | Disable-CsUser -ErrorAction SilentlyContinue

If you have some accounts that were previously members of an elevated group like Domain Admins, but no longer are, then the AdminCount parameter on their account may still be set. This will cause the Access Denied issue to continue. You can manually change this on the user object using ADSIEDIT, or via a script such as Set-AdminUser.